
Fresh & Velvety DIY Face Cream Recipe 

When a natural face cream is so pleasant that simply thinking about applying it makes you happy, it stops being a simple DIY cosmetic. It becomes a full experience, a complete and holistic beauty ritual.

This DIY face cream has an incredibly pleasant texture. It’s fresh, nourishing and velvety at the same time, with a lovely natural aroma that makes me want to reach for it again and again. The scent comes from a lovely essential oil blend I created and that I’ll share with you later.

I formulated this cream especially for the beginning of fall, when the skin can feel stressed and a little more reactive after summer and starts craving hydration, comfort and barrier support, while still wanting something light and fresh.

I designed the lipid phase to feel light and balanced rather than greasy, making this cream especially lovely for combination skin and skin that needs soothing care, barrier support and extra hydration without heaviness.

The Secret Behind a Fresh and Velvety Texture
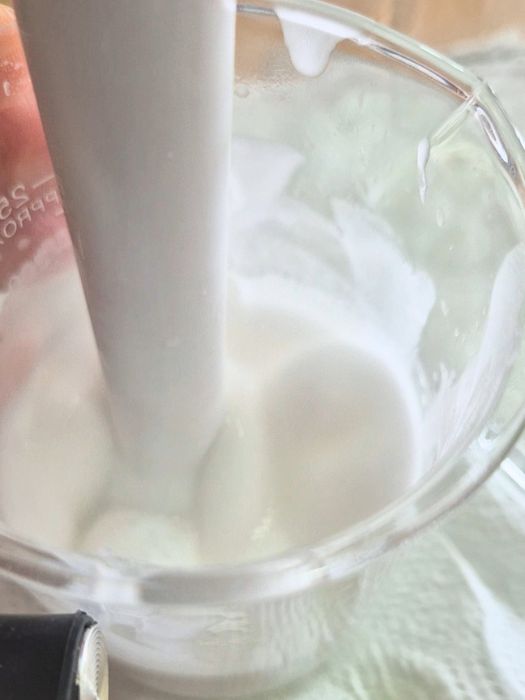
velvety diy face cream texture

The texture is probably my favourite part of this cream.

I wouldn’t define it as a gel-cream, but it has a similar freshness and light consistency, while still leaving the skin comfortably nourished and velvety.

The secret lies in the carefully built fatty phase and the precious ingredients around it.

If you have followed Lily in WonderLab for a while, you probably know how much attention I give to the balance between different oils. I’m not a fan of one-oil-only creams, and I consider them one of the most common formulation mistakes.

Different oils bring completely different textures, spreading behaviours and after-feels. A cream becomes much more interesting when we balance light, silky and richer lipids instead of asking one single oil to do everything. Also, it will last longer on the skin thanks to the different absorptions.

A Carefully Built Oil Phase

The oil phase begins with squalane, one of my favourite ingredients when I want a lightweight elegant and silky feel.

Squalane has excellent skin affinity. It softens the skin and supports the skin barrier feel without making the formula heavy.

Then comes macadamia oil, my little secret weapon whenever I want to create a more velvety texture. Macadamia oil is especially interesting because of its content of palmitoleic acid, a fatty acid that is relatively unusual in vegetable oils and gives macadamia its characteristic smooth and nourishing sensory profile.

I also added the fantastic watermelon seed oil, one of my latest finds on Handymade.

It’s quite lightweight and particularly rich in linoleic acid, an essential fatty acid that plays an important role in maintaining a healthy skin barrier. Linoleic acid is involved in the formation of important epidermal lipids, including ceramides, and an altered lipid balance has been associated with eczema, dermatitis and clogged pores. 
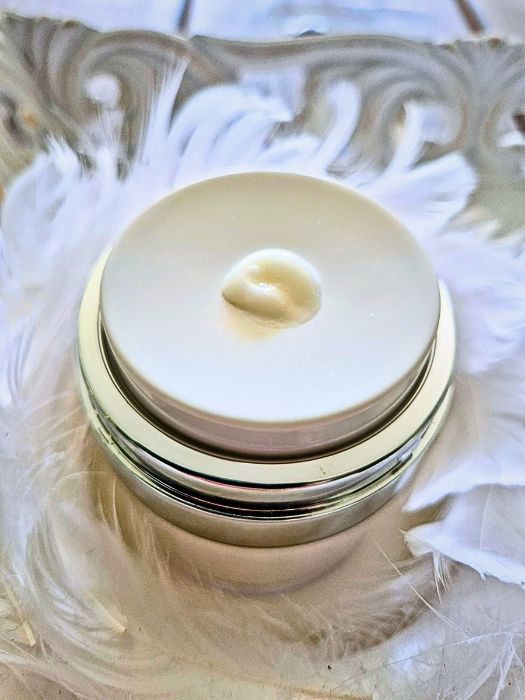
guggul chia co2 extract diy face cream

Then comes one tiny ingredient that makes a surprising difference: castor oil at just 0.5%.

I wouldn’t use much more in this type of facial cream because castor oil can quickly become heavy, sticky or greasy. But at this dosage, I find that it helps the comfortable feeling of hydration last a little longer without making the cream oily.

And believe me, this little trick really makes a difference!

Finally, 1% mango butter adds a subtle touch of creaminess without turning this into a heavy butter cream. 

Sodium PCA: One of the Secrets Behind the Skin Feel

The water phase also has a wonderful ally behind the beautiful texture of this cream: Sodium PCA (50% version).

Sodium PCA is an excellent humectant and is related to the skin’s own Natural Moisturizing Factor, or NMF. It helps attract and retain water, supporting hydration and leaving the skin soft and comfortable.

I love what it does sensorially in a formula, contributing to a fresh and amazing texture.

The Real Stars: Chia Seed CO₂ and Guggul CO₂ Extract
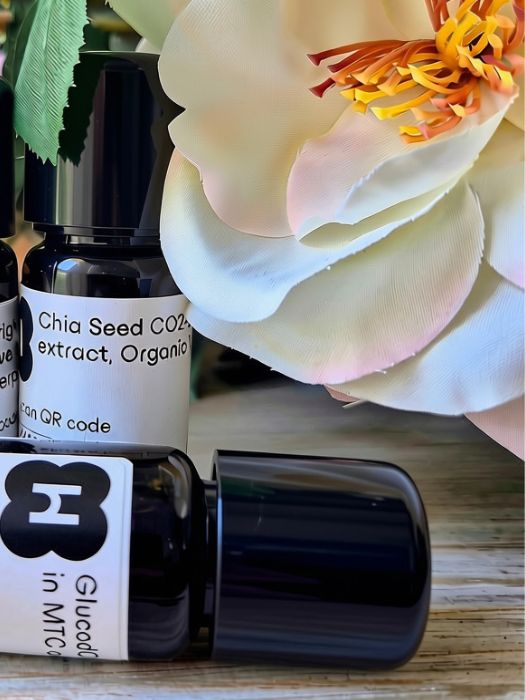
guggul chia co2 extract handymade

The texture makes this cream a pleasure to use, but the ingredients that make it especially interesting from a skincare point of view are Chia Seed CO₂ Extract and GlucodOX Liquid Guggul Extract.

Both can be found at Handymade, and considering how unusual and precious these ingredients are, I find their prices surprisingly accessible.

Chia Seed CO₂ Extract

Chia Seed CO₂ Extract is soothing and maintains a healthy skin barrier. 

It is rich in essential fatty acids, especially alpha-linolenic acid and linoleic acid.

We already talked about the importance of linoleic acid for the skin barrier, and chia brings another beautiful lipid profile to the formula. This is exactly the type of ingredient that makes sense in a cream designed for skin that feels a little stressed after summer.

GlucodOX Liquid: Guggul Extract in MCT Oil

And then there is GlucodOX Liquid, one of the more unusual ingredients in this formula.

It is a CO₂ extract obtained from the resin of guggul, containing interesting compounds called guggulsterones and guggulsterols, which have been studied for antioxidant, soothing and regenerative activity.

This is why I find GlucodOX especially interesting in formulas designed to support mature, stressed or reactive skin.

Its presence adds a meaningful antioxidant and anti-ageing dimension to the cream and complements the barrier-supporting lipid phase beautifully.

It is also interesting for skin prone to irritation and redness, which is another reason why I wanted it in this post-summer formula.

A Little Caffeine Secret

Another little secret hidden inside the formula is 1% caffeine.

One reason I like it in facial products is its relationship with cutaneous microcirculation, which makes it particularly interesting for skin that looks tired or slightly puffy.
lightweight velvety diy face cream recipe

And What About the Scent?

The scent is beautiful. Fresh and elegant, with just enough depth underneath to make it more interesting than a simple citrus-floral blend.

I combined the fresh citrus notes of bergamot, the soft and powdery floral elegance of Rosa centifolia, and just a tiny touch of frankincense.

For bergamot, I use the furanocoumarin-free version, also known as Bergamot FCF. This is the version I prefer for leave-on facial cosmetics because it is not phototoxic.

For rose, I use the beloved Rosa centifolia essential oil diluted to 10% I talked about in this article, where I also explain why this is the version we should use in DIY cosmetics. It’s much more practical than the expensive concentrated oil, easier to dose accurately, more economical and perfect for small DIY batches like this one.

Finally, I add just a little frankincense essential oil.

Its warm, woody and resinous character completes the perfume without overwhelming the bergamot or rose. That tiny amount makes the scent feel complete.

DIY Face Cream Recipe 

Phase A

Distilled water — 70.58 g (70.58%)
Xanthan gum — 0.20 g (0.20%)
Glycerin — 2 g (2%)
Sodium PCA 50% — 3 g (3%)
Caffeine — 1 g (1%)

Phase B

Olivem 1000 — 5 g (5%)
Macadamia oil — 3 g (3%)
Squalane — 4 g (4%)
Castor oil — 0.5 g (0.5%)

Phase B1

Watermelon seed oil — 4 g (4%)
Mango butter — 1 g (1%)

Phase C

GlucodOX Liquid — 2 g (2%)
Chia Seed CO₂ Extract — 2 g (2%)
Tocopherol — 0.5 g (0.5%)
Rosa centifolia Essential Oil 10% — 0.28 g (0.28%)
Bergamot FCF Essential Oil — 0.28 g (0.28%)
Frankincense Essential Oil — 0.06 g (0.06%)
Cosgard — 0.6 g (0.6%)

All the ingredients used in this formula can be purchased from Handymade. Use my affiliate code WONDERLAB for a 7% discount and don’t forget to add the free gift they give for every order!

How to Make the Face Cream

  • Start by preparing Phase A. Place the water and caffeine in a heat-resistant beaker and warm gently until the caffeine has completely dissolved.
    In another beaker, premix the xanthan gum with glycerin until you have a smooth mixture with no dry clumps.
    Pour the caffeine-water mixture over the xanthan and glycerin while stirring. Allow the xanthan gum to hydrate and the gel to develop. You can simply leave it for a few minutes or use a mini mixer to speed up the process.
    Once the gel has formed, add the Sodium PCA and mix well.

  • In a separate heat-resistant beaker, combine the Phase B ingredients: Olivem 1000, macadamia oil, squalane and castor oil.

  • Heat Phase A and Phase B separately until they reach approximately 70–75°C, making sure that the Olivem 1000 has completely melted.

  • At the end of the heating phase, add the watermelon seed oil and mango butter from Phase B1 to the oil phase. I add them at this stage to expose them to high temperatures for as little time as possible.

  • Make sure Phase A and Phase B are at approximately the same temperature, around 70–75°C. Pour Phase B into Phase A. Use an immersion blender for approximately 2–3 minutes, until the emulsion has formed and looks homogeneous. Then, continue stirring occasionally with a spatula while the cream cools.

  • Once the temperature has dropped below 40°C, add the Phase C ingredients one by one and stir thoroughly after every addition.

  • Check the pH, that should be around 5.0–5.5. Adjust it if necessary. Your face cream is ready to enjoy!

My Favourite Packaging for This Cream

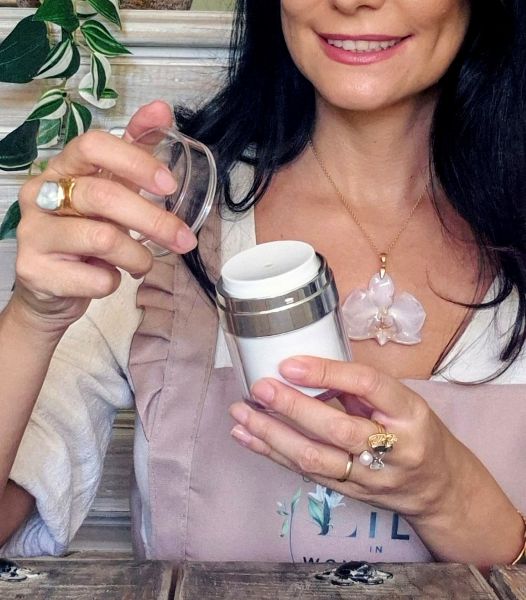
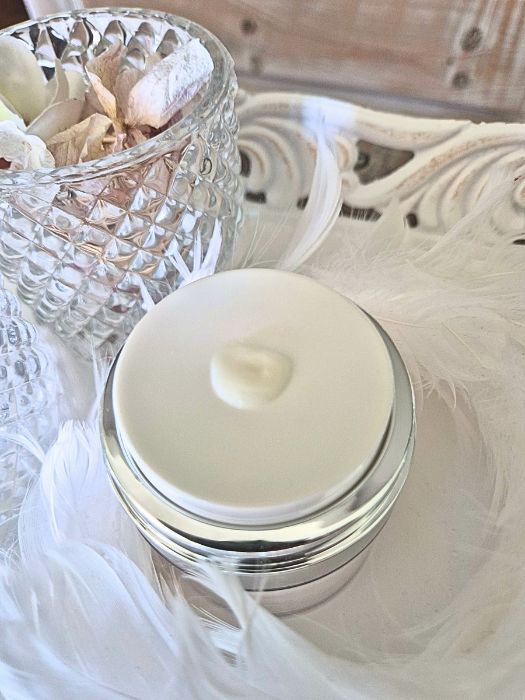
I added mine to this beautiful airless jar from Handymade, and I love it for this type of formula.

It is hygienic and helps reduce repeated contact between the cream, your fingers and the outside environment. You simply press the top and the right amount of cream appears. So satisfying!

Of course, airless packaging does not replace proper preservation, but it is a very practical choice for a preserved emulsion like this one and helps protect the formula during everyday use.
watermelon seed oil diy face cream

My Little Secret for a Better Natural Fragrance

And now one last tip about the scent…

Essential oils can absolutely be added to a cream one by one when you make it, and you will already get a lovely fragrance.

However, there is another little trick I use.

If you premix the aromatic ingredients in a small bottle and leave the blend to rest for one or two weeks, the fragrance becomes noticeably more harmonious.

The aromatic molecules have time to meet and settle together, and instead of smelling like separate notes added at the last minute, the perfume starts to feel like one composition.

Adding the essential oils separately is faster, but if you use this little trick, you will notice the difference. I almost always do it now.

Since we are working with very small quantities, I usually multiply the fragrance formula by five or even ten and prepare a small bottle in advance.

For example, to make enough fragrance for five batches of this cream, mix:

Rosa centifolia Essential Oil 10% — 1.40 g
Bergamot FCF Essential Oil — 1.40 g
Frankincense Essential Oil — 0.30 g

This gives you 3.10 g of natural fragrance blend.

Leave it to rest in a small, well-closed dark bottle.Then, whenever you prepare another 100 g batch of the cream or any other similar DIY cosmetic, simply add 0.62 g of your premixed fragrance blend in Phase C.

Natural Mosquito Repellent Blend for Summer Evenings

Mosquitoes hate this blend… but I love it!

Summer evenings are special. The air becomes softer, the light turns golden and everything feels slower… until the mosquitoes arrive!

Every year, before going on holiday, I prepare my own mosquito repellent essential oil blend. I usually make a good amount because I use it in different ways: a stronger version for my home spray and a gentler version for the body.

Making your own mosquito repellent blend is very easy. For the body, you can simply add the essential oil blend to a DIY cream, lotion, carrier oil or any suitable cosmetic formula. I personally prefer using it in a lightweight body lotion, because it feels more pleasant in summer, especially if the formula also contains soothing ingredients like panthenol, cornflower extract, allantoin or aloe.

In this recipe, I’ll show you how to prepare a concentrated essential oil blend that you can then add to your formulas, just like you would use a pre-made natural fragrance or essential oil blend.

The advantage of preparing the blend in advance is that the aromatic molecules have time to meet, soften and become more harmonious before you use them. You can add the essential oils one by one directly to a cream, but the result is not exactly the same. When they rest together first, even for a few days, the scent becomes more complete.

If you love the purity of fragrance, I suggest doing this with every essential oil blend you like adding to your cosmetics: create your own small natural fragrance oils in advance, label them clearly and use them with precision.

mosquito repellent blend summer night

This Summer Night Mosquito Repellent Blend is fresh, green, floral, citrusy and softened by the deep blue touch of blue tansy. It is made with lemon eucalyptus, geranium, bergamot FCF (furocoumarin free - don’t use the classic version in summer, I’ll explain why below), and blue tansy essential oils.

The result is a summer evening aroma: bright enough to be functional against mosquitoes, but still elegant enough to make you enjoy using it. Blue tansy adds a calming aromatic shadow and gives the blend a whimsical blue hue.

Of course, this is still a mosquito repellent blend, so it is not the same kind of scent as a fine perfume. But it is pleasant, bright, green and beautiful if you enjoy fresh citrusy notes.

Important Safety Note: This Is a Concentrated Essential Oil Blend!

This is very important:

This blend is not meant to be applied pure on the skin.

It is a concentrated essential oil blend created to be diluted into cosmetic formulas, such as body lotions, body creams, body oils, carrier oils or an alcohol base for a room spray.

Essential oils are powerful aromatic materials. Even when they are natural, they need to be used with precise percentages, especially in leave-on cosmetics.

For body care, this blend should be used at a maximum of 0.8% in the finished body product.

This means 0.8 g of essential oil blend for 100 g of body lotion, body oil or cream.

Why this precise limit? Mainly because of the lemon eucalyptus essential oil. It is one of the most interesting essential oils for summer evening formulas, but it also requires careful dosage.

Why These Essential Oils?

I selected these essential oils for different reasons. They are all disliked by mosquitoes, even if at different levels, and I blended them because I wanted something functional but still pleasant to use during summer nights.

Let’s see the reason behind each choice.

Lemon Eucalyptus Essential Oil

Lemon eucalyptus essential oil (also known as eucalyptus citriodora) is the heart of the blend. It smells like eucalyptus with a bright citrusy note, almost as if it was already a composed blend. It is fresher, more sophisticated and much more pleasant than regular eucalyptus essential oils.

Apart from its beautiful green-citrus scent, lemon eucalyptus is one of the most effective aromatic materials used in mosquito repellent blends. It is more effective than citronella, which I personally don’t enjoy as much.

Also, lemon eucalyptus essential oil is used to produce Citriodiol, a highly effective plant-derived repellent used in many commercial mosquito repellent products. 

lemon eucalyptus mosquito


The oil I have is from Handymade
, and I love it. As always, buy essential oils from a provider you trust, because not all essential oils smell the same, even when they have the same INCI name. If you buy it on Handymade, use my affiliate code WONDERLAB for a 7% discount.

Because lemon eucalyptus is powerful, I keep it carefully calculated.

Its IFRA limit for body lotion/body cream use (Category 5A) can be around 0.38% maximum, depending on the supplier and batch. Always check the IFRA certificate of the exact essential oil you have.

In this blend, lemon eucalyptus represents 40% of the blend. So, if you use the finished blend at 0.8% in a body product, the final lemon eucalyptus level will be 0.32% in the finished product. This keeps it below the example IFRA limit of 0.38% for body use.

This is why we cannot simply say, “essential oils can be used at 1–3% in body cosmetics.” Sometimes that is true, but not always. If a blend contains essential oils with lower IFRA limits, the final dosage must be calculated around the most restrictive ingredient.

Geranium Essential Oil

Geranium brings floral brightness to the blend and is also a good mosquito-repellent essential oil.

It rounds the sharper freshness of lemon eucalyptus and gives the formula a more sophisticated feeling. Lemon eucalyptus is beautiful alone, much more than other eucalyptus oils like eucalyptus globulus, but without geranium the blend would feel more functional and less elegant.

Geranium makes it more wearable and more cosmetic.

Bergamot FCF Essential Oil

Bergamot adds brightness and elegance. It is one of the most beautiful essential oils in botanical perfumery, and this is the main reason I added it.

I use bergamot FCF, which means it is furocoumarin-free. This is important because regular expressed bergamot essential oil can be phototoxic, while bergamot FCF is the safer choice for leave-on cosmetics when used correctly.

This is less important during the colder months, but in summer or whenever there is sun exposure, it makes a real difference.

bergamot FCF essential oil

Bergamot FCF is not always easy to find, but you can purchase it from Handymade. Use my affiliate code WONDERLAB for a 7% discount.

In any case, I use this blend during the evening, and I don’t recommend applying perfumes or essential oils before sun exposure.

If you don’t have furocoumarin-free bergamot, omit it. It gives a perfumery touch to the blend, but lemon eucalyptus, geranium and blue tansy are still beautiful together.

Never use regular expressed bergamot in a summer leave-on body product. Phototoxicity is a real issue, always use the FCF version.

Blue Tansy Essential Oil

Blue tansy (Tanacetum annuum flower oil) adds the magical final touch: deep blue, herbal, slightly sweet and calming in character. 

It is very intense, so a little is enough. In this blend, it does not dominate. It gives depth and softness, like a blue shadow inside the green freshness of the formula.

It also makes the blend blue, but don’t worry: when you dilute the final blend in a cream at the suggested percentage, it should not color the formula. It may give a subtle blue tone to a carrier oil, but it should not stain the skin.

In any case, always make a small test after dilution and avoid contact with fabrics.

mosquito repellent recipe

Summer Night Essential Oil Blend Recipe

This recipe makes 5 g of concentrated essential oil blend.

It cannot be used pure and must be diluted before use, as explained above.

You can prepare it in a small dark glass bottle, label it clearly and then dilute it into your formulas whenever needed.

Formula

Essential oil

% in blend

Amount for 5 g

Geranium essential oil

45%

2.25 g

Lemon eucalyptus essential oil

40%

2.00 g

Bergamot essential oil FCF*

10%

0.50 g

Blue tansy essential oil

5%

0.25 g

Total

100%

5.00 g

Use only bergamot FCF, which means furocoumarin-free bergamot. If you only have regular bergamot essential oil, omit it.

What If You Don’t Have All These Essential Oils?

This blend is more sophisticated than a very simple mosquito repellent blend, but if you don’t have all the essential oils, you can simplify it. 

The most functional combination would be Lemon eucalyptus + geranium or, if you want to use only one essential oil, simply choose Lemon eucalyptus, which is the most important one in this blend.

Remember to  keep it around 0.35% maximum even when used alone, or lower if your supplier’s IFRA certificate gives a stricter limit. Always check the IFRA certificate of your own essential oil.

how to make mosquito repellent blend

How to Use the Blend in a Body Lotion, Cream or Carrier Oil

Use the Summer Night Essential Oil Blend at a maximum of 0.8% of the finished cosmetic formula.

This turns a simple body lotion, cream, or oil into a summer night mosquito repellent body product.

Do not use more than this for body leave on use and do not use this blend in face products. A blend containing lemon eucalyptus is not a common choice for the face, and the IFRA limit for face use is much lower. For this reason, I prefer keeping this blend for body products only.

Usage Examples

Finished product size

Maximum essential oil blend to add

50 g body lotion, cream, or oil

0.4 g

100 g body lotion, cream, or oil

0.8 g

200 g body lotion, cream, or oil

1.6 g

Make Your Summer Night Air Spray

You can also use this blend to create a simple home air perfume spray for your home or terrace.

For an air perfume, I suggest using it at 2%, that is a good balance. IFRA limits are different for home spray products and are usually much higher than for leave-on skin products.

Formula for 100 g Home Spray

Ingredient

%

Amount

Alcohol 96°

98%

98 g

Summer Night Essential Oil Blend

2%

2 g

Mix the essential oil blend into alcohol, bottle it and allow it to rest at least for a couple of days before use.

Use it as a room spray, not as a skin spray. Spray lightly into the air, away from the face, eyes, pets, babies and delicate surfaces or textiles. Do not spray directly on skin, pillows, bedding, furniture or clothing.

mosquito blend diy essential oils

A Small Note About DIY Mosquito Repellents

DIY mosquito repellent blends are beautiful for cosmetic and home use, especially when you want something natural, fragrant and pleasant for summer evenings.

However, if you are in an area where mosquitoes can transmit disease, use a properly tested and registered repellent.

Summer Glow Face & Body Oil with Q10, Carrot CO₂ Extract and Oat Oil 

This summer face & body oil formula has everything I want in this kind of cosmetic: it helps comfort sun-stressed skin, brings a rich antioxidant touch, supports the glow of tanned skin and leaves the skin barrier soft and comfortable. On top of that, it has a light and elegant texture that feels so pleasant during the hottest months.

It is the kind of oil you like to use when your skin feels dry, tired and stressed by a long sun exposure.
You’ll find it nourishing but not heavy, rich in botanical oils but still silky, golden and luminous, but not glittery or artificial.

Another thing I love about this formula is its versatility. None of the oils I selected has a high comedogenic rating, so the recipe can be suitable for both face and body. This makes it a smart little cosmetic to bring with you during your holidays: one bottle, many uses and a lovely summer glow!

As always, this oil does not replace sunscreen. It can be used as a beautifying and nourishing oil for summer skin and aftersun recovery, but SPF is still essential during sun exposure.

carrot co2 q10 recipe

Focus on the Ingredients

Physalis Angulata Extract: Soothing Care for Summer Skin

One of the main soothing ingredients in this formula is Physalis angulata extract, a wonderful active I use every summer.

It is known for its soothing and anti-inflammatory properties, and it is also often used in formulas designed to support mature and fragile skin.
It’s also an ally for skin prone to redness and sensitivity, including rosacea prone skin. Of course, rosacea is a skin condition that should be approached gently and, when needed, with professional advice, but from a cosmetic point of view, Physalis angulata is one of those ingredients I find very valuable.
The texture is buttery and semi-solid, so it needs to be gently warmed before being incorporated into the formula. This is why the method includes a first warming step with the most heat resistant oils. 
If you don't have it, you can replace it with other extracts like Seabuckthorn (I have the one from Handymade), that is especially beautiful and useful in summer.

Oat Oil: Comfort for the Skin Barrier

Oat oil is another beautiful ingredient for summer skin. It naturally contains lipid components that are very interesting for barrier care, including ceramides, and it is often used in formulas for sensitive or compromised skin. In this recipe, I chose it because it helps restore comfort to sun-stressed skin and provides an extra soothing boost

Q10 and Carrot CO₂ Extract: The Antioxidant Golden Touch

To enrich the formula with an antioxidant boost I used Coenzyme Q10 and Carrot CO₂ extract.

Q10 is one of my favorite oil-soluble antioxidants for mature and dull skin. It gives the formula a more sophisticated skincare profile and pairs beautifully with the other ingredients I selected, especially when the goal is to support the skin against oxidative stress.

Carrot CO₂ extract brings a different kind of beauty. It is rich in carotenoids, the naturally golden-orange pigments that give carrot extract its sunny and joyful color. In this formula carotenoids bring antioxidant support and also give the oil a warm golden tone.

On the skin this creates a subtle and natural skin tone enhancing effect with a delicate golden veil that makes the skin look warmer and more luminous.

I used carrot CO₂ extract at 3% and I do not recommend using more in this formula, because this dosage is already enough for the results we want. If used at a higher percentage, it may stain the skin or textiles. At 3% the result is lovely and balanced, but I still recommend letting the oil absorb well before getting dressed.

You can find both Q10 and Carrot CO₂ extract on Handymade. Click here to read more about them.

A Light & Elegant Oil Base

The base of this formula is designed to feel nourishing but not greasy.

I used coco-caprylate for a dry and silky touch, squalane for its elegant skin feel and barrier supporting properties, jojoba oil because it is so skin friendly and well tolerated, and grapeseed oil to keep the blend lighter.

I also included calendula oil, one of my favorite botanical oils when I want a calming and comforting effect. I always make it by macerating calendula in sunflower oil to enhance its soothing properties. Click here to learn how to make it at home.

The final texture is lightweight, smooth and pleasant to apply. It leaves the skin with a nourished finish and a soft golden glow, without feeling too heavy for summer.

aftersun face oil recipe

Summer Glow Oil Formula

This summer glow oil is simple to make, but it teaches a lot about formulation. You learn how to work with a semi-solid CO₂ extract, how to incorporate Q10 more easily and how to build an oil blend that is rich in care but still elegant and lightweight on the skin.

A small bottle of sunshine for the skin, with a little science inside!

Ingredients

Little summer gift: during July 2026, Handymade is offering a 5 ml Carrot CO₂ extract as a free gift for every order. You only need to go to your cart and select it in the free gifts available. Remember that you can also use my affiliate code WONDERLAB for an extra 7% discount! Perfect timing if you want to make my golden summer oil recipe!

Method

  • Start by adding coco-caprylate, squalane, jojoba oil, and Physalis angulata extract to a heat-resistant beaker. Gently heat the mixture while stirring until the Physalis angulata extract is completely melted and well incorporated. I use these ingredients in the heated step because Physalis extract needs warmth to melt properly, while coco-caprylate, squalane and jojoba oil are more heat-resistant than the delicate oils and antioxidants added later.

  • Once everything is melted, remove the beaker from the heat and let the mixture cool down below 40°C.

  • When the blend is slightly warm, add Q10 powder, which usually incorporates more easily in slightly warm oils, so this is the perfect moment to add it. Stir until the Q10 is fully dispersed.

  • Then, add oat oil, grapeseed oil, calendula oil, carrot CO₂ extract and vitamin E. Stir until the formula looks uniform.

  • Pour into a clean dry bottle. Your summer glow oil is ready!

How to Use It

Apply a small amount and massage gently until absorbed.

For the body, I love using it after a shower, when the skin is still slightly damp. In general, I always suggest applying oils over hydrated skin rather than completely dry skin. An oil can soften, nourish and help reduce water loss, but it does not bring water to the skin by itself.

You can apply this oil after a hydrating mist, or after a thin layer of aloe vera gel. Aloe works beautifully here because it adds a fresh soothing touch, which makes this skincare step even more suitable for summer skin.

Remember: hydrate first, then seal in that hydration with the oil.

Raspberry Body Mist Recipe

Body mists are one of my favorite cosmetics in summer. They are simple, light, refreshing and so easy to love. A few sprays on the skin can change the mood of a warm afternoon, soften that heavy feeling after being outside or bring back a delicate scent when you want to feel fresh again.

This raspberry body mist recipe hydrates the skin of the face and body while gently scenting it with natural aromatic ingredients. It is not a perfume and doesn’t contain alcohol. It is more like a hydrating and delicately scented treatment, something that cares for the skin and the senses at the same time, in a holistic way.

You can keep it in your bag and spray it whenever you need a little refresh. You can use it after cooking, when you want your skin to smell beautiful again. You can mist it on your body during the day, or use it after a shower before applying body oil. If you follow me, you already know how much I recommend using oils and solid lotion bars on slightly hydrated skin, because they help seal that hydration with their protective and nourishing touch. This mist is perfect for that: spray, let your skin absorb the freshness, then seal it with your favorite body oil.

diy raspberry body mist recipe

The Inspiration Behind This Raspberry Body Mist

I built the scent of this formula around raspberry water, a wonderful raspberry fruit distillate in aloe vera from Handymade that I talked about in this article.

Its scent is delicate, joyful, fruity and playful, and it reminded me of sweet memories from my childhood.
It smells amazing on its own, but when I first smelled it, I immediately dreamed of making it play with two other notes: Centifolia rose essential oil, for a feminine and powdery floral touch, and Vanilla extract, for a warm and sweet nuance.

The result is a refined, joyful and feminine scent that I’m sure you’ll love. And the part I love most is that this scent comes from natural aromatic ingredients, not from an artificial fragrance.

How to Scent a Hydrosol Mist Without Covering It 

When we work with delicate aromatic distilled waters, it is very important to respect their nature.

Their scent is soft and fragile and a strong fragrance or an essential oil used in too high a percentage could easily cover the beautiful raspberry note, losing the whole point of this formula.

This is why I chose the aromatic part very carefully, because I wanted ingredients that could elevate raspberry's natural scent, not take its place.

Rose and vanilla are perfect for this kind of work because they can accompany the raspberry note beautifully when used in very small amounts. They do not make the mist smell like a strong perfume, but they simply add depth and a more refined personality to raspberry.

Why I Chose Centifolia Rose

Rose can be found in different varieties and each one has its own character.

For this recipe, I chose centifolia rose because it has a more delicate, powdery and romantic profile. This was exactly the note I wanted here.

Rose damascena can also work, and it would stay beautifully with raspberry too, but the final result would be different, more rosy and vibrant.

The centifolia rose material I used is a 10% dilution. As I explained in this other article, this is usually the best format for DIY cosmetics because it helps us dose precious and powerful aromatic materials more accurately. It also helps avoid using too much, which is especially important when working with ingredients that must respect dermal safety and IFRA limits.

The Vanilla Note

The vanilla material I used is an organic Vanilla CO₂-HA extract that smells wonderful and is soluble in water and alcohol. It adds warmth without making the mist feel heavy. In this formula, the vanilla does not dominate the raspberry but it stays in the background, like a soft golden veil behind the fruit and rose.

This is what makes the scent feel more rounded and feminine.

centifolia rose vanilla raspberry mist handymade

A Fresh Mist That Doesn’t Need Too Much 

The recipe is effective but quite simple, and I did this intentionally.
I wanted to keep the mist light, fresh, sprayable and not sticky, so I selected only a few but performant ingredients, each one with a clear function. Sometimes, a beautiful formula is not the one with the longest ingredient list, but the one where every ingredient has a reason to be there.

Why I Chose Pentylene Glycol Instead of Glycerin

Instead of glycerin, I selected pentylene glycol ECO. Glycerin is one of the best humectants, but in a spray formula it can easily feel sticky, especially in summer. Pentylene glycol gives a more elegant finish: it hydrates, improves the skin feel, leaves a light conditioning touch and also helps the formula as a solvent and preservative booster.

In this recipe, pentylene glycol supports Euxyl K 712 (INCI: Sodium Benzoate, Potassium Sorbate, Aqua), the preservative I chose because it has a neutral scent and does not disturb the delicate raspberry aroma.

Why I Added Solagum AX

The gum I chose is Solagum AX, a natural blend of xanthan gum and acacia gum. I used it at a very low percentage, only 0.1%, not to make a gel, but to improve the skin feel.

Solagum AX does not thicken as much as xanthan gum alone, which makes it more suitable for sprayable and liquid cosmetics when used in very small amounts. In this mist, it gives a light and velvety after feel without making the product heavy.

You can omit it if you want a simpler version. It is not strictly necessary, but it is one of those small formulation details that can move a recipe from basic to more refined.

Why This Recipe Needs a Solubilizer

This recipe also requires a solubilizer for the centifolia rose essential oil dilution.

I used Solubol, which is usually used at around 4 times the amount of aromatic material to be dispersed, but you can use another solubilizer if you prefer. Just make sure to check your supplier’s technical sheet, because the recommended dosage can change depending on the solubilizer.

I know that many people add essential oils directly to water-based formulas and simply shake the bottle before using them. If you have no solubilizer and you really want to make a mist, shaking can temporarily disperse the droplets, but it is not the proper way to formulate this type of product. Essential oils do not dissolve in water. Without a solubilizer, the aromatic droplets will float in the cosmetic and then distribute unevenly on the skin. When properly solubilized, the scent performs better, the formula is more elegant, and the aromatic material is distributed more evenly through the product.

raspberry distilled water body mist

Raspberry Body Mist Formula

Phase A

Phase B

Almost all the ingredients can be found on Handymade. Just click on the related links to go to each ingredient page. Remember that you can also get a 7% discount with my affiliate code: WONDERLAB
Enjoy this little gift!

How to Make the Raspberry Body Mist

Prepare Phase A

  • Weigh Solagum AX in a clean beaker.
  • Add pentylene glycol and mix well until you create a smooth paste. This helps disperse the gum and reduces the risk of clumps.
  • Slowly add the raspberry distilled water, little by little, while mixing.Let the gum hydrate for a few moments. You can use a mini immersion blender to speed up the process, but avoid incorporating too much air.
  • When the mixture looks uniform, add the vanilla CO₂-HA extract and mix again. Then add Euxyl K 712 and stir until the formula is fully uniform. 

Prepare Phase B

  • In a separate small beaker, mix Solubol and Centifolia rose oil. Stir until the mixture looks uniform.
  • This step helps disperse the aromatic rose material properly before adding it to the water-based phase. 

Combine the Two Phases

Add Phase A slowly into Phase B, mixing gently. Stir until the body mist looks uniform.

Check and Adjust the pH

Check the final pH and adjust it if needed. The pH should be around 5.0 and below 5.5, because Euxyl K 712 needs it to preserve effectively. Do not skip this important step!

Bottle the Mist

Pour the mist into a clean spray bottle (the mist container you can see in the pictures is from Handymade too and you can purchase it with the other ingredients with a 7% discount with code WONDERLAB).
Your refreshing and delicately fragrant all-over hydrating body mist is ready. Spray it whenever you want a soft cloud of raspberry, rose and vanilla on your skin! If you use it on the face, keep your eyes closed and avoid spraying too close to the eyes.

After Wax Oil for Sensitive Skin (Soothing Body Oil Recipe)

I made this DIY after wax oil for sensitive skin to restore comfort gently, supporting the skin barrier and helping the skin return to a calm and balanced state.

After waxing and depilation, the skin enters a delicate phase. The barrier is temporarily disrupted, hydration escapes more easily and the skin doesn’t feel comfortable.

This is where a well-formulated oil can make the difference.

It’s intentionally simple to prepare, so no heating, no tools…  just a thoughtful blend of lipids chosen for both their skin affinity and sensory harmony!

For best results, apply aloe vera gel first to bring hydration to the skin, then follow with the oil to help seal it in and support barrier recovery. This simple step can make a visible difference in how the skin feels and recovers, I promise you! Find my aloe vera gel recipe here.

 post wax skin care oil application eczema sensitive skin

Focus on the After Wax Oil Formula

What makes this after wax oil blend special is not just the ingredients themselves, but how they are balanced.
The formula combines soothing botanical oils, barrier-restoring lipids and a balanced carrier structure that ensures the oil glides pleasantly. 

  • Calendula-infused oil is the calming heart of the blend, widely used to calm stressed skin and support recovery. Learn how to make it here.

  • Oat oil brings a comforting layer to the formula, helping the skin feel immediately better. Naturally rich in ceramides and sterols, it beautifully supports the lipid barrier. Also, its soothing compounds reduce redness and calm reactive skin. One of my favorite oils.

  • Jojoba oil, structurally similar to the skin’s own lipids, helps restore balance and improve tolerance after waxing. It has a lightweight texture that improves the overall feel.

  • Squalane reinforces the skin barrier while giving a silky, elegant and very light finish.

  • Fractionated coconut oil lightens the blend, improving spreadability.

  • Bisabolol provides calming support, especially helpful for post-wax discomfort.

  • Vitamin E protects the oils from oxidation and supports skin recovery.


Suitable for Eczema-Prone & Atopic Skin

This oil can also be used on eczema-prone and atopic skin, where the skin tends to be more sensitive, with a weakened barrier and a tendency to lose moisture. In these conditions, the skin often feels dry, itchy, reactive and less able to retain hydration.

If you want to refine the formula further for this type of skin, you may consider incorporating ceramides, which are widely used in these cases with excellent results. You could also add a phytosterol rich concentrate, that helps to reinforce the lipid barrier and visibly soothe irritation. In any case, oat oil is one of the best oils for this kind of skin.


diy after wax oil sensitive skin soothing body oil

🌸 Ingredients (100 g batch)

🧪 How to Make Your Soothing After Wax Oil

  • Combine all ingredients in a clean container and stir gently until fully uniform. No heating is required, which helps preserve the integrity of the more delicate components.
  • Transfer into a bottle, ideally with a pump or dropper.

Additional Notes & Replacements

  • If you’re missing some ingredients, try to keep at least oat oil or calendula-infused oil in the formula, as they form the soothing core. Other beautiful alternatives could be chamomile-infused oil or pumpkin seed, passionfruit (passiflora), raspberry seed and sesame oil.

  • Squalane adds both functional value and a refined skin feel. If needed, you can replace it with another lightweight oil or simply increase the amount of jojoba oil or fractionated coconut oil to maintain balance.

  • If you prefer an even lighter texture, you can partially or fully replace fractionated coconut oil with coco-caprylate. However, for post-wax care, I prefer a more cocooning feel, as the skin often responds better to a touch of softness and protection.

  • Bisabolol provides a soothing boost. You may omit it or replace it with another calming oil-soluble active, such as Physalis angulata CO₂ extract, which offers a particularly strong soothing effect for reactive skin and is also used for dermatitis and rosacea.